macOS Assistive Software
Universal Access
If you're looking for KeyStrokes and SwitchXS, with the release of MacOS High Sierra (10.13) Assistiveware has discontinued these products.
There are macOS solutions for issues with mobility, blindness and low vision, and speech generation. The built in functions often change between versions of macOS. Some of the screens shown below will likely change as well. icons may look different, be reorganized or even appear on diffenent pages within settings.
Apple maintains a help site for their built in, on–screen keyboard.
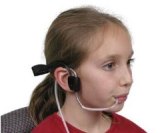
For mobility, macOS has an on–screen keyboard suitable for direct selection with a mouse emulator and one designed for scanning with one or more adaptive switches. Origin Instruments provides a head–tracking, mouse emulator known as HeadMouse and several adaptive switches and switch interfaces for computers, tablets and phones.
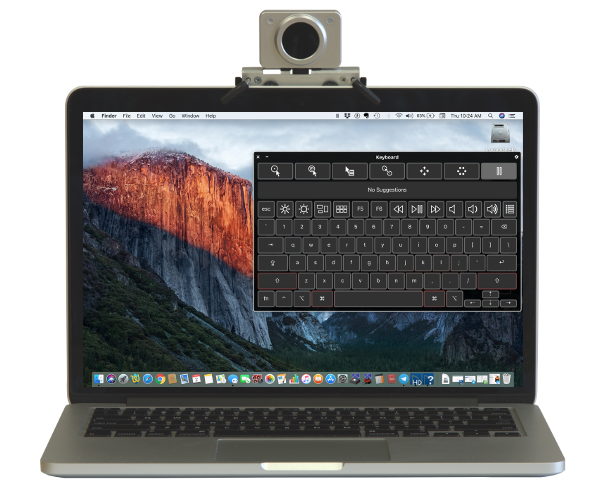
For HeadMouse
HeadMouse users should use the "Accessibility Keyboard" designed for use with a USB mouse or USB mouse emulator. You find it by selecting the Accessibility icon in the macOS System Preferences

After opening the Accessibility window scroll down the left side of the window and select the "Keyboard" option. Then on the right side of the Accessibility window you will see two options at the top, select "Accessibility Keyboard."
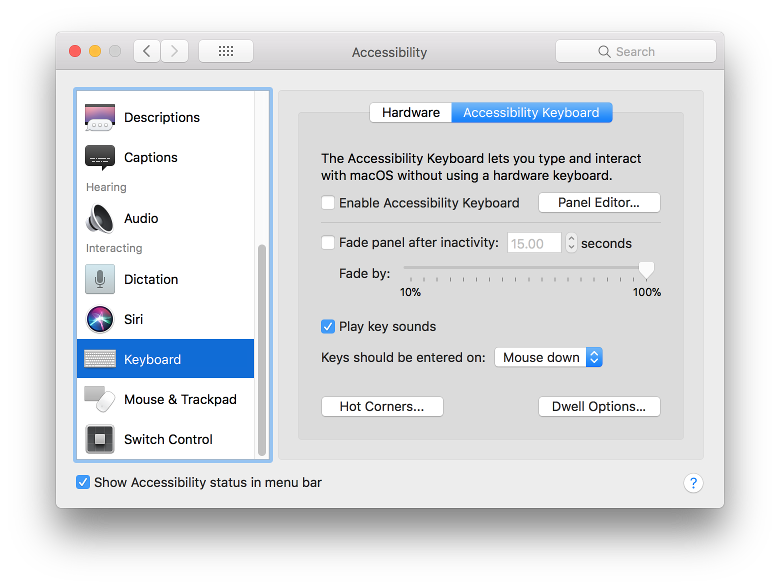
This will reveal the configuration settings for the Keyboard. Most mouse emulators, including HeadMouse have a 3.5mm jack for accepting up to two adaptive switches for entering mouse button clicks. If you cannot use an adaptive switch for mouse clicks then select the "Dwell Options…" button to open the dwell configuration window.
Always use an adaptive switch for mouse clicks, if you can – it's easier.
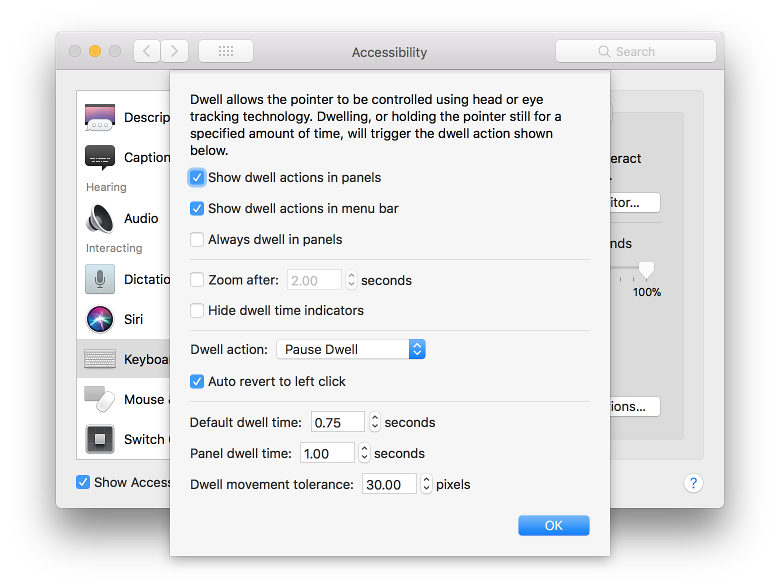
Dwell Options will allow you to click, double-click and right-click (control-click) any item by hovering over it for a programmable time. You can even use dwell to select, drag and drop any object across the Mac desktop.
Use the dwell settings to control the dwell time. You can use different dwell times while hovering inside the panel (on-screen keyboard) verses other parts of the screen.
Another important setting is the Dwell movement tolerance. With a HeadMouse it's impractical to hold your head perfectly still to trigger the dwell selection so an adjustable tolerance is built-in. If you stay within the tolerance region for the dwell time a mouse click will occur. After a dwell click you have to move the mouse pointer out of the tolerance region to reset for another dwell click.
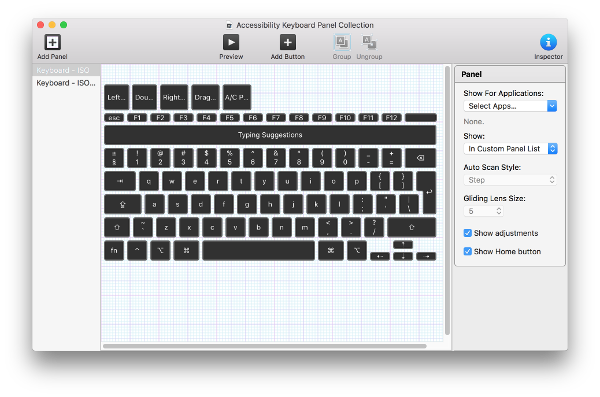
Finally, you can modify the default panel (keyboard) layout or even create several custom layouts. Build different panels optimized for different applications or the task at hand. You can even make special keys for launching apps, and if you're really ambitious you can write your own applescripts and launch them with a custom key in your panel.
Follow this link to Apple's web page for more information about macOS built-in Accessibility.
For Switch Scanning
Mac computers do not have an adaptive switch interface. One must be provided with the adative switch. Virtually all adaptive switches use a 3.5mm (1/8-inch headphone) audio connector. Even though they fit, these adaptive switches do NOT plug into the headphone jack on your device (computer, tablet or phone).
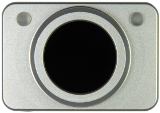
Swifty and Tapio are USB interfaces for connecting adaptive switches to a Mac computer (actually, almost any computer, tablet or phone). We offer Orby, our colorful button-style switch and two styles of a sip and puff switch.
macOS provides a simple, but powerful access solution that uses one or more switches to control the sequential scanning of an on-screen panel (keyboard). When operating in Auto scanning mode and the button you want is highlighted you press your adaptive switch to select it. The panels have a regular array of buttons with standard alphanumeric, punctuation, special function and mouse pointer control keys. You can even make special keys for launching apps, and if you're really ambitious you can write your own applescripts and launch them with a custom key in your panel.
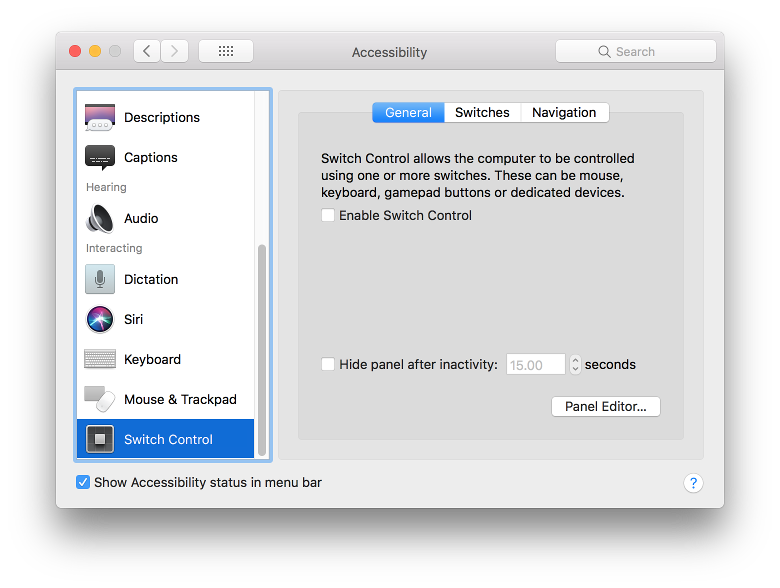
You find Switch Control by clicking on the Accessibility icon from the System Preferences screen.
After opening the Accessibility window scroll down the left side of the window and select the "Switch Control" option. This will open the "General" settings for configuring Switch Control. This tab is where you launch Switch Control.
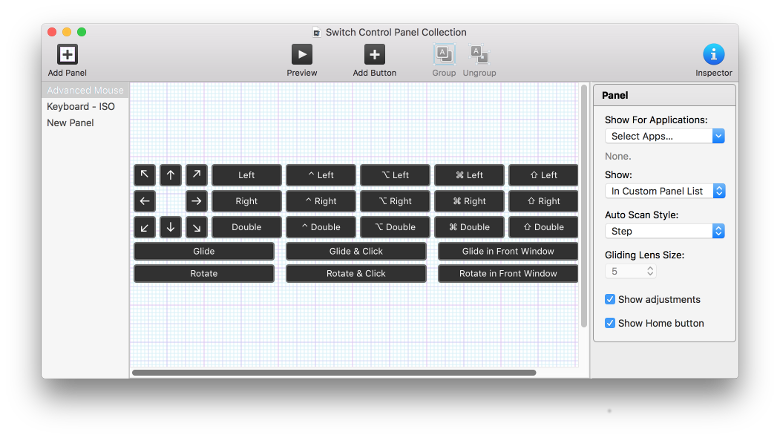
This screen is also where you launch the Panel Editor if you want to make your own custom panel (keyboard layout). Shown in the Panel Editor screen below is a special panel to facilitate navigating the mouse pointer and generating various mouse button button functions – clicks, double clicks and drags. Of course you can make traditional text centric layouts as well, such as alphabetical.
Check the Enable Switch Control checkbox to launch Switch Control, but before you do, you should configure your adaptive switch(es) and adjust the utility settings.
Click on the Switches tab to add and configure your adaptive switch(es). This screen is where you tell Switch Control how to use built-in buttons (mouse or hard keyboard) or external adaptive switches to scan the panel (on-screen keyboard) and macOS interface. It is also where you adjust some of the timing parameters for scanning, by clicking on the Timing... button near the bottom of the screen.
If you can, use two-switch scanning – it's easier.
The configuration shown below is for two switch scanning - one switch selects items and the second switch moves to the next item in the scan order. The scan order is how the highlight moves between keys on a panel (on-screen keyboard) or items in a program. This scan order is definded in advance and usually cannot be changed by the user. Two switches are Required and in the screen below the first external switch is labeled "switch1," the second switch is also external and it is labeled "switch2." switch1 is assigned the function of "Select Item" and switch2 is assigned the function of "Move To Next Item."
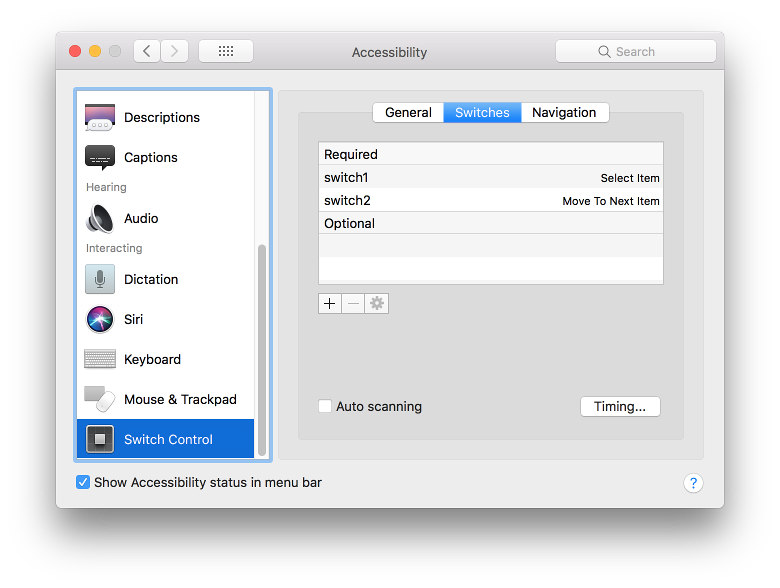
As the assigned functions imply, you repeatedly tap switch2 to move from item to item and when the highlight is on the item you wish to select you tap switch1. If the highlighted item you selected was a panel key (on-screen keyboard key) for a letter that letter would be sent to whatever application on your device has focus.
For Auto scanning all you need is one adaptive switch. Tap the switch and Switch Control will automatically move the highlight from one item to the next. When the item you wish to select is highlighted, you tap your switch again to complete the selection.

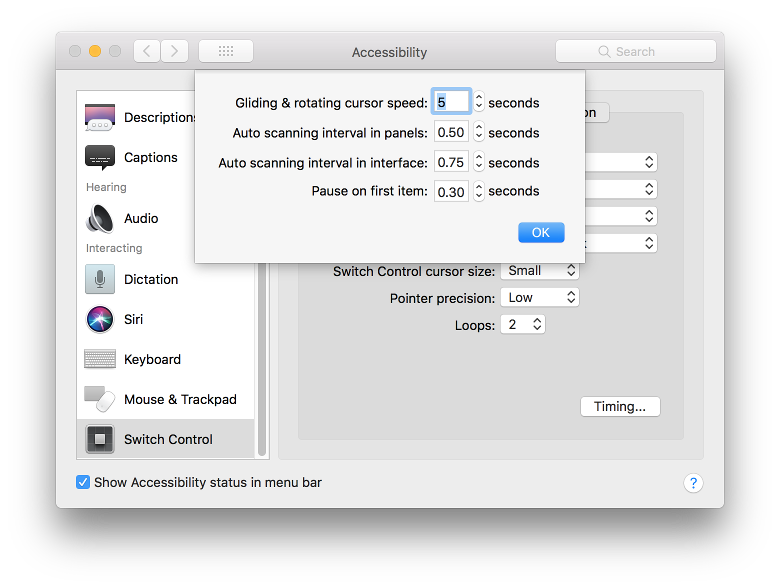
Select the Timing… button to control how fast the Auto scanning highlight moves through the panel keys or other items in the user interface.
A gliding & rotating cursor are two different methods of moving the mouse pointer to any arbitrary location on the screen.
Gliding cursor allows you to position a vertical and then a horizontal line on the screen and the mouse pointer is moved to where they cross. First tap your switch to start the vertical line sweeping across your screen. When it crosses where you want to position your mouse pointer, tap your switch. Next, the horizontal line starts sweeping down your screen. Tap your switch again when this line crosses where you want your mouse pointer. Then you can perform a mouse operation – click, double-click, etc.
A rotating cursor draws a line from the current mouse pointer location and sweeps the line across the desktop in a circle. When it crosses where you want to position your cursor you tap you switch and the pointer moves down that line. When it arrives at the desired location, tap you switch again to position the mouse pointer. Then you can perform a mouse operation – click, double-click, etc.
Follow this link to Apple's web page for more information about macOS built-in Accessibility.

USB switch interface
Wireless head-tracking
Sip and puff switch solution
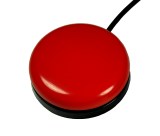
Orby Switch

Origin Instruments Corporation
854 Greenview Drive
Grand Prairie, Texas, 75050 USA
Email: [email protected]
Voice: 972-606-8740
FAX: 972-606-8741
HeadMouse is a registered trademark of Origin Instruments Corporation. PageBot, Swifty, Beam, Orby, Breeze, SofType, Dragger, and AirVoter are trademarks of Origin Instruments Corporation. All other trademarks are the property of their respective owners.
